
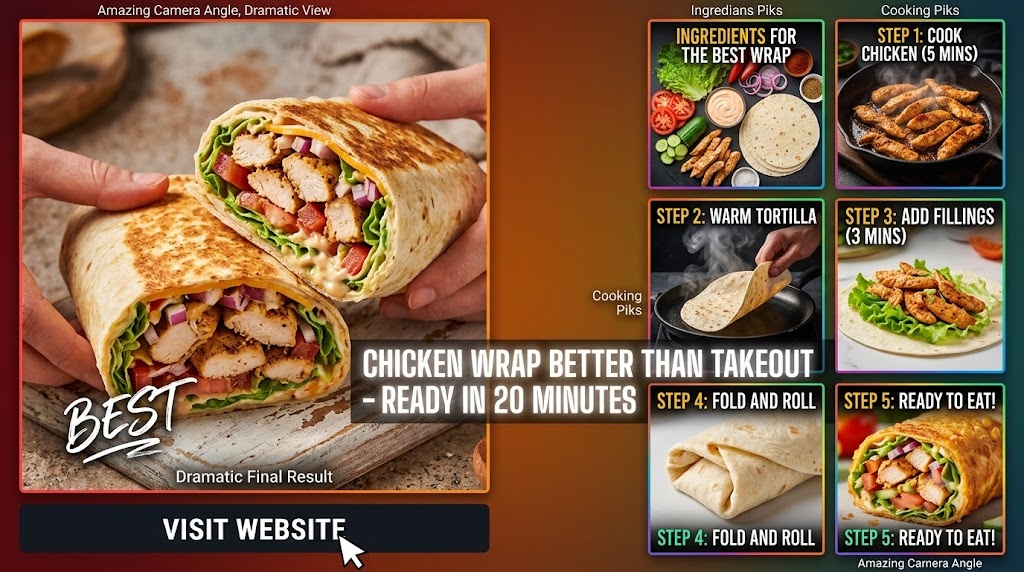
The reason most takeout wraps fail is simple: compromise. Restaurants compromise on the quality of the oil, the freshness of the greens, and most importantly, the structural integrity of the tortilla. To create a chicken wrap that is truly better than takeout, we have to approach it with the precision of a line cook and the soul of a home gourmand. We aren’t just putting ingredients in a circle of dough; we are building a flavor profile that stands up to the first bite and stays satisfying until the very last crumb.
Why Texture Is the Secret Ingredient
When you order a wrap from a local deli or a national chain, you usually encounter one of two problems: it’s either a “soggy mess” because the dressing has compromised the bread, or it’s “desert dry” because they’re afraid of the mess. In my kitchen, we solve this through the “Barrier Method.Chicken Wrap Better Than Takeout
Craving a restaurant-style chicken wrap without leaving home? This easy homemade chicken wrap is packed with juicy seasoned chicken, crisp vegetables, melted cheese, and a creamy garlic sauce—all wrapped in a warm, soft tortilla. It’s perfect for lunch, dinner, meal prep, or a quick family meal. Best of all, it comes together in under 30 minutes and tastes even better than takeout.
Why You’ll Love This Recipe
- Better than restaurant takeout
- Ready in about 30 minutes
- Crispy outside and juicy inside
- Easy to customize
- Great for meal prep
- Budget-friendly
Ingredients
For the Chicken
- 2 boneless, skinless chicken breasts
- 2 tablespoons olive oil
- 1 teaspoon paprika
- 1 teaspoon garlic powder
- 1 teaspoon onion powder
- ½ teaspoon black pepper
- 1 teaspoon salt
- ½ teaspoon cumin
- ½ teaspoon chili powder (optional)
- ½ teaspoon dried oregano
- 1 tablespoon lemon juice
For the Garlic Sauce
- ½ cup mayonnaise
- 2 tablespoons plain yogurt
- 2 garlic cloves, minced
- 1 teaspoon lemon juice
- ½ teaspoon black pepper
- Pinch of salt
Wrap Filling
- 4 large flour tortillas
- 1 cup shredded lettuce
- 1 medium tomato, sliced
- ½ cucumber, sliced
- ½ red onion, thinly sliced
- 1 cup shredded cheddar or mozzarella cheese
- Pickles (optional)
Kitchen Equipment
- Large skillet or grill pan
- Mixing bowls
- Knife
- Cutting board
- Tongs
- Measuring spoons
- Spatula
Step 1: Season the Chicken
Pat the chicken dry using paper towels.
In a bowl combine:
- Olive oil
- Paprika
- Garlic powder
- Onion powder
- Salt
- Pepper
- Cumin
- Chili powder
- Oregano
- Lemon juice
Coat the chicken evenly with the seasoning mixture.
Let it marinate for at least 20 minutes. For the best flavor, marinate for 2–8 hours in the refrigerator.
Step 2: Cook the Chicken
Heat a skillet over medium-high heat.
Add a small amount of oil.
Cook the chicken for 6–7 minutes per side until golden brown.
The internal temperature should reach 165°F (74°C).
Remove from the pan and let it rest for 5 minutes before slicing into thin strips.
Step 3: Make the Garlic Sauce
Mix together:
- Mayonnaise
- Yogurt
- Garlic
- Lemon juice
- Salt
- Black pepper
Stir until smooth.
Refrigerate until ready to use.
Step 4: Prepare the Vegetables
Wash and dry all vegetables.
Slice:
- Tomatoes
- Cucumbers
- Red onions
Shred the lettuce if needed.
Keep everything chilled until assembling.
Step 5: Warm the Tortillas
Heat each tortilla for about 20–30 seconds on each side in a dry skillet.
This makes them soft and easier to roll.
Step 6: Assemble the Wrap
Spread garlic sauce over the tortilla.
Layer in this order:
- Lettuce
- Chicken slices
- Cheese
- Tomatoes
- Cucumbers
- Onion
- Pickles (optional)
Do not overfill.
Step 7: Fold the Wrap
Fold both sides inward.
Roll tightly from the bottom upward.
Press gently to keep everything inside.
Step 8: Toast the Wrap
Place the wrap seam-side down in a hot skillet.
Cook for 2–3 minutes per side until golden brown and crispy.
Slice in half before serving.
Serving Suggestions
Serve with:
- French fries
- Sweet potato fries
- Coleslaw
- Potato wedges
- Fresh salad
- Chips
- Pickles
Pro Tips
- Marinate the chicken longer for deeper flavor.
- Slice the chicken after resting to keep it juicy.
- Warm tortillas before rolling.
- Don’t overfill the wrap.
- Toast the wrap for a crispy exterior.
- Use freshly grated cheese for the best melt.
Recipe Variations
Spicy Chicken Wrap
Add extra chili powder, cayenne pepper, or sliced jalapeños.
BBQ Chicken Wrap
Replace the garlic sauce with barbecue sauce.
Buffalo Chicken Wrap
Mix cooked chicken with buffalo sauce.
Healthy Wrap
Use whole wheat tortillas and Greek yogurt instead of mayonnaise.
Mediterranean Wrap
Add olives, feta cheese, and cucumber with tzatziki sauce.
Storage Instructions
Refrigerator
Store assembled wraps in foil or an airtight container for up to 2 days.
Cooked chicken can be refrigerated separately for up to 4 days.
Freezer
Freeze cooked chicken for up to 3 months.
Do not freeze assembled wraps with fresh vegetables, as they lose texture when thawed.
Reheating
Heat in a skillet for 3–4 minutes per side or in an oven at 350°F (175°C) for about 10 minutes. Avoid microwaving if you want the wrap to stay crispy.
Nutrition (Approximate Per Wrap)
- Calories: 560
- Protein: 36g
- Carbohydrates: 34g
- Fat: 30g
- Fiber: 3g
- Sugar: 4g
- Sodium: 780mg
Frequently Asked Questions
Can I use chicken thighs?
Yes. Boneless, skinless chicken thighs are even juicier and work perfectly.
Which tortillas are best?
Large flour tortillas are easiest to roll and hold the filling well.
Can I prepare these in advance?
Yes. Prep the chicken, sauce, and vegetables ahead of time, then assemble just before eating for the freshest texture.
How do I keep the wrap from falling apart?
Avoid overfilling, fold the sides inward first, roll tightly, and toast seam-side down to help seal it.”
Sourcing Your Ingredients Like a Pro
To beat the professional kitchens, you have to source like one. This doesn’t mean you need a commercial license, but it does mean looking past the generic brands at the grocery store.
The Protein: Thighs vs. Breasts
In a restaurant setting, we often use chicken breasts because they are perceived as “healthier” by the consumer. However, if you want a wrap that stays juicy even if you pack it for lunch three hours later, chicken thighs are the superior choice. The higher fat content in thighs provides a built-in safety net against overcooking. If you insist on breasts, you must use a brine or a heavy marinade to maintain moisture.
The Vessel: The Tortilla Matters
Most people grab the first bag of tortillas they see. For a takeout-quality wrap, you need a high-moisture flour tortilla. Look for “raw” tortillas in the refrigerated section that you cook yourself, or ensure the ones you buy are large enough (10 to 12 inches). A wrap that is too small will always tear, leading to the dreaded “bottom leak” that ruins the takeout experience.
The Fat: Don’t Use Mayo Alone
Mayonnaise is a great base, but it lacks complexity. A professional-grade sauce involves an acid (lemon juice or vinegar), a fat (mayonnaise or Greek yogurt), and an aromatic (garlic or fresh herbs). This trifecta ensures that every bite stimulates the entire palate.
Recipe Details
- Prep Time: 15 minutes
- Cook Time: 10 minutes
- Total Time: 25 minutes
- Servings: 4 wraps
- Cuisine: American
- Course: Lunch / Dinner
- Difficulty: Easy
Ingredients
For the Chicken
- 2 boneless, skinless chicken breasts (about 1 lb), sliced into strips
- 2 tbsp olive oil
- 1 tsp paprika
- 1 tsp garlic powder
- 1 tsp onion powder
- ½ tsp dried oregano
- ½ tsp ground black pepper
- 1 tsp salt
- ½ tsp chili powder (optional)
For the Creamy Wrap Sauce
- ½ cup mayonnaise
- 2 tbsp Greek yogurt or sour cream
- 1 tbsp ketchup
- 1 tsp Dijon mustard
- 1 tsp lemon juice
- ½ tsp garlic powder
- Pinch of black pepper
For the Wraps
- 4 large flour tortillas
- 1½ cups shredded romaine lettuce
- 1 cup shredded cheddar or Monterey Jack cheese
- 1 medium tomato, diced
- ½ red onion, thinly sliced
- ½ cup cucumber, diced (optional)
- ½ avocado, sliced (optional)
Instructions
Step 1: Season the Chicken
In a bowl, combine the chicken strips with olive oil, paprika, garlic powder, onion powder, oregano, salt, pepper, and chili powder. Mix well and let marinate for 10 minutes.
Step 2: Cook the Chicken
Heat a large skillet over medium-high heat. Cook the chicken for 4–5 minutes per side until golden brown and fully cooked (internal temperature reaches 165°F/74°C).
Step 3: Make the Sauce
Whisk together mayonnaise, Greek yogurt, ketchup, Dijon mustard, lemon juice, garlic powder, and black pepper until smooth.
Step 4: Warm the Tortillas
Heat each tortilla in a dry skillet for about 20 seconds per side or microwave for 15 seconds until soft and pliable.
Step 5: Assemble the Wraps
Spread a generous spoonful of sauce over each tortilla. Add lettuce, cheese, cooked chicken, tomatoes, onion, cucumber, and avocado if using.
Step 6: Wrap and Serve
Fold in the sides, roll tightly, and slice in half. Serve immediately with fries, potato wedges, or a fresh salad.
Nutrition (Per Serving)
- Calories: 580 kcal
- Protein: 36g
- Carbohydrates: 34g
- Fat: 31g
- Saturated Fat: 8g
- Fiber: 4g
- Sugar: 5g
- Sodium: 920mg
Recipe Tips
- Marinate the chicken for up to 30 minutes for even more flavor.
- Add crispy bacon for a smoky twist.
- Use grilled chicken for a lighter version.
- Swap cheddar for pepper jack if you like extra heat.
- Meal prep the ingredients separately and assemble fresh wraps when ready to eat.
This recipe delivers juicy, flavorful chicken, fresh vegetables, and a creamy homemade sauce for a wrap that’s truly better than takeout.
Essential Kitchen Tools for Success
- Cast Iron Skillet or Heavy Stainless Steel Pan: You need high heat retention to get that “takeout char” without drying out the center of the meat.
- A Sharp Chef’s Knife: Uniformity in your vegetable cuts ensures that you don’t get a giant hunk of onion in one bite and nothing in the next.
- Kitchen Scale: If you want consistency, weigh your protein.
- Parchment Paper or Foil: This is the “pro secret” for wrapping. If you want that tight, professional cylinder shape, you must wrap it in paper first to set the shape.
The Professional Recipe Breakdown
Phase 1: The Signature Marinade
Takeout chicken is often bland because it’s cooked in bulk and seasoned only on the surface. We are going to infuse flavor deep into the muscle fibers.
- 1.5 lbs Chicken Thighs (Boneless/Skinless)
- 3 tbsp Extra Virgin Olive Oil
- 2 cloves Garlic (Mashed into a paste)
- 1 tsp Smoked Paprika (For that “grill” flavor)
- 1 tsp Dried Oregano
- 1/2 tsp Cumin
- Salt and Black Pepper to taste
- Zest of half a lemon
Chef’s Note: Do not add the lemon juice to the marinade if you are letting it sit for more than 4 hours. The acid will begin to “cook” the chicken and change the texture to something grainy. Save the juice for the final sear.
Phase 2: The “Better-Than-Takeout” Secret Sauce
This sauce is inspired by the “white sauces” found in high-end Mediterranean wraps but with a creamy American twist.
- 1/2 cup Avocado Oil Mayonnaise
- 1/4 cup Full-Fat Greek Yogurt
- 1 tsp Dijon Mustard
- 1 tbsp Fresh Dill (Minced)
- 1/2 tsp Garlic Powder
- A dash of Sriracha or Cayenne (Optional for heat)
Phase 3: The Crunch Elements
- Romaine Hearts: Use the inner leaves for maximum snap.
- English Cucumber: These have thinner skin and fewer seeds, preventing the wrap from getting watery.
- Pickled Red Onions: These provide the necessary acidity to cut through the fat of the chicken and sauce.
- Vine-Ripened Tomatoes: Remove the watery seeds before dicing.
Step-by-Step Culinary Instructions
1. The Sear
Heat your skillet over medium-high heat. Add a tablespoon of high-smoke-point oil (like grapeseed or avocado oil). Place the chicken thighs in the pan, ensuring they aren’t crowded. You want to hear a loud sizzle. Leave them alone for 5-6 minutes to develop a deep golden-brown crust. Flip once and cook until the internal temperature reaches 165°F. Remove from the pan and—this is crucial—let the meat rest for at least 8 minutes. If you cut it immediately, the juices will run out, and you’ll end up with a dry wrap.
2. The Tortilla Prep
While the chicken rests, wipe out your skillet. Place each tortilla in the dry, hot pan for 15 seconds per side. This softens the gluten and makes the tortilla pliable. A cold tortilla will crack; a warm tortilla will mold to your ingredients.
3. The “Builder’s” Assembly
Lay the warm tortilla on a piece of parchment paper.
- Layer 1: Spread a thin layer of the secret sauce across the middle third of the tortilla.
- Layer 2: Add a bed of greens. This acts as a moisture barrier between the meat and the bread.
- Layer 3: Slice the chicken against the grain into thin strips and lay them over the greens.
- Layer 4: Add your cucumbers, tomatoes, and pickled onions.
- Layer 5: Another small drizzle of sauce.
4. The Professional Fold
Fold the sides of the tortilla inward over the filling. Then, using your thumbs, bring the bottom of the tortilla up and over the sides. Tuck the edge under the filling and roll tightly. Once rolled, wrap the parchment paper tightly around it and twist the ends. Let it sit for 2 minutes. This “sets” the wrap so it doesn’t fall apart when you eat it.
Common Mistakes to Avoid
Even seasoned cooks can stumble when it comes to the “simple” wrap. Avoid these pitfalls to ensure your results truly surpass the local takeout joint.
- Overstuffing: It is tempting to pile on the ingredients, but if you can’t get at least two full rotations of the tortilla around the filling, it’s too full. Overstuffed wraps are impossible to eat cleanly.
- Using Wet Vegetables: If you wash your lettuce, make sure it is bone-dry before it touches the tortilla. Use a salad spinner or pat it down with paper towels. Water is the enemy of a structural wrap.
- Skipping the Rest: As mentioned, resting the meat is non-negotiable. It allows the fibers to reabsorb the juices, ensuring every bite is succulent.
- Neglecting the “Toast”: If you want to go the extra mile, once the wrap is rolled, place it back in the skillet for 30 seconds on the “seam side” to seal it shut and add a final bit of crunch to the exterior.
Recipe Variations from Around the Globe
One of the best things about mastering the chicken wrap is that the basic blueprint can be adapted to any flavor profile.
The Southwest Fusion
Replace the oregano and dill with cilantro and lime. Add black beans, charred corn, and a spicy chipotle ranch sauce. Use pepper jack cheese for an extra kick.
The Mediterranean Powerhouse
Stick with the original marinade but add feta cheese, Kalamata olives, and swap the secret sauce for a thick, garlicky Tzatziki. This version is best with a slightly thicker pita-style wrap.
The Buffalo Blue
Toss your cooked chicken strips in a classic buffalo sauce (butter and hot sauce). Use celery salt in your spice rub and replace the secret sauce with a chunky blue cheese dressing. Add some shredded carrots for that signature buffalo wing crunch.
The Asian-Inspired Ginger Wrap
Marinade the chicken in soy sauce, sesame oil, and ginger. Use a slaw of shredded cabbage and carrots instead of romaine. Use a spicy peanut sauce as your binder.
Making This Budget-Friendly
Takeout has become incredibly expensive. A standard chicken wrap at a mid-tier restaurant can now cost upwards of $12 to $15. By making this at home, you can drive that cost down to approximately $3.50 per wrap.
- Buy in Bulk: Chicken thighs are often sold in family packs for a fraction of the price of smaller portions.
- Make Your Own Pickles: Pickled red onions are just vinegar, sugar, salt, and water. A jar at the store is $6; making it at home costs cents.
- Seasonal Greens: If romaine is expensive, kale or even finely shredded green cabbage works beautifully and lasts longer in the fridge.
Storage and Meal Prep Mastery
Can you make these ahead of time? Yes, but with conditions.
If you are meal prepping for the week, do not assemble the wraps in advance. Instead, use a “Deconstructed Wrap Kit.”
- Store the cooked and sliced chicken in one container.
- Keep the chopped vegetables in a separate container (with a paper towel at the bottom to absorb moisture).
- Store the sauce in a small jar.
- When you are ready to eat, heat the chicken and tortilla, then assemble.
This prevents the “Soggy Bread Syndrome” that plagues leftover takeout. If you must assemble them for a grab-and-go lunch, put the sauce in the very center of the chicken, far away from the edges of the tortilla, and wrap the whole thing in foil.
Freezing Instructions
Believe it or not, you can freeze chicken wraps! However, you should only freeze the “hot” components.
- To Freeze: Create a wrap with cooked chicken, cheese, and perhaps some cooked beans or rice. Do not include lettuce, tomatoes, or cucumbers, as they will turn to mush upon thawing.
- To Reheat: Wrap in a damp paper towel and microwave for 2 minutes, or for best results, bake in a toaster oven at 350°F until the center is hot. Add your fresh greens and cold sauce after reheating.
Nutrition Information (Per Wrap)
While this varies based on your specific ingredients, a standard professional-style chicken wrap using the ingredients listed above roughly breaks down to:
- Calories: 550
- Protein: 38g
- Carbohydrates: 42g
- Fats: 24g
- Fiber: 4g
To make it lighter, you can swap the flour tortilla for a large collard green leaf or a low-carb wrap, and use only Greek yogurt for the sauce base.
Best Side Dishes to Complete the Meal
If you’re serving this for dinner and want to move beyond the standard bag of chips, consider these “chef-approved” pairings:
- Sweet Potato Fries with Smoked Paprika: The sweetness of the potatoes complements the savory, charred chicken.
- Lemon-Garlic Orzo Salad: A light, refreshing pasta side that mirrors the Mediterranean notes of the wrap.
- Charred Broccoli with Parmesan: For a low-carb side, toss broccoli florets in olive oil and roast at 425°F until the edges are crispy and dark.
- Couscous with Fresh Herbs: A quick-cooking side that acts as a great palate cleanser between bites of the rich wrap.
Frequently Asked Questions
Why does my wrap always fall apart?
This is usually due to one of three things: the tortilla was cold and brittle, the wrap was overstuffed, or it wasn’t rolled tightly enough. Always warm the tortilla first and use the parchment paper “twist” method to let the shape set before cutting.
Can I use a rotisserie chicken to save time?
Absolutely. To make a rotisserie chicken taste “Better Than Takeout,” I recommend shredding it and tossing it in a hot pan with a little bit of the marinade spices for 2 minutes. This “refreshes” the meat and gives it the crispy edges that make a wrap special.
What is the best way to cut a wrap?
Use a serrated knife (bread knife) and cut at a diagonal angle. A serrated blade saws through the layers without squishing the ingredients out the sides. The diagonal cut also makes for a better presentation—just like in a high-end cafe.
Is it better to use corn or flour tortillas?
For a large, foldable wrap, flour is the standard. Corn tortillas are generally too small and fragile for a traditional wrap, though they are excellent for tacos. If you are gluten-free, look for cassava or almond flour tortillas, which tend to be more pliable than corn.
How do I stop the “bottom leak”?
The “bottom leak” happens when liquid from the tomatoes or sauce collects at the base. To prevent this, place a dry leaf of lettuce at the very bottom of your fold to act as a “plug,” and ensure you’ve deseeded your tomatoes.
What’s the best way to reheat a wrap?
Avoid the microwave if possible, as it makes the bread chewy. Instead, use a panini press or a dry skillet over medium heat. This will crisp up the outside while gently warming the inside.
Can I make this vegan?
Easily! Swap the chicken for firm tofu that has been pressed and seared with the same marinade. Use a vegan mayonnaise and a coconut-based yogurt for the secret sauce. The flavor profile remains almost identical.
How long does the secret sauce last in the fridge?
Because of the fresh dill and lemon, it is best used within 4 to 5 days. Keep it in an airtight glass jar for maximum freshness.
Can I add cheese?
Yes, but choose a cheese that complements the other flavors. For the Mediterranean style, feta or goat cheese is best. For a more American takeout style, a sharp white cheddar or provolone works beautifully. If you want it melted, add it to the hot chicken right before assembly.
Why do you recommend parchment paper?
In professional kitchens, we use parchment or “deli paper” because it provides tension. You can pull the paper much tighter than you can pull the tortilla alone. It also keeps the wrap clean if you’re eating on the go.
Final Thoughts on the Ultimate Chicken Wrap
Creating a meal that is “Better Than Takeout” isn’t about having a secret ingredient that no one else can find. It’s about the respect you show to the process. It’s taking the extra five minutes to toast your spices, the extra eight minutes to let your meat rest, and the extra thirty seconds to warm your tortilla.
When you sit down to eat this wrap, you’ll notice the difference immediately. The chicken will be succulent and fragrant, the vegetables will provide a bright, clean snap, and the sauce will tie everything together with a creamy, zesty finish. This isn’t just a sandwich; it’s a testament to the fact that home cooking, when done with professional techniques, will always reign supreme over the convenience of a drive-thru.
Whether you’re prepping these for a busy week of work or serving them for a casual weekend lunch with friends, these chicken wraps are guaranteed to become a staple in your culinary repertoire. Forget the menu in the drawer—your kitchen is now the best restaurant in town.
SEO Summary: This comprehensive guide to making a Chicken Wrap Better Than Takeout covers everything from marinade science to professional folding techniques. By focusing on ingredient quality, texture contrast, and structural integrity, you can create a restaurant-quality meal at home for a fraction of the price. Perfect for meal prep, family dinners, or a gourmet lunch on the go.