
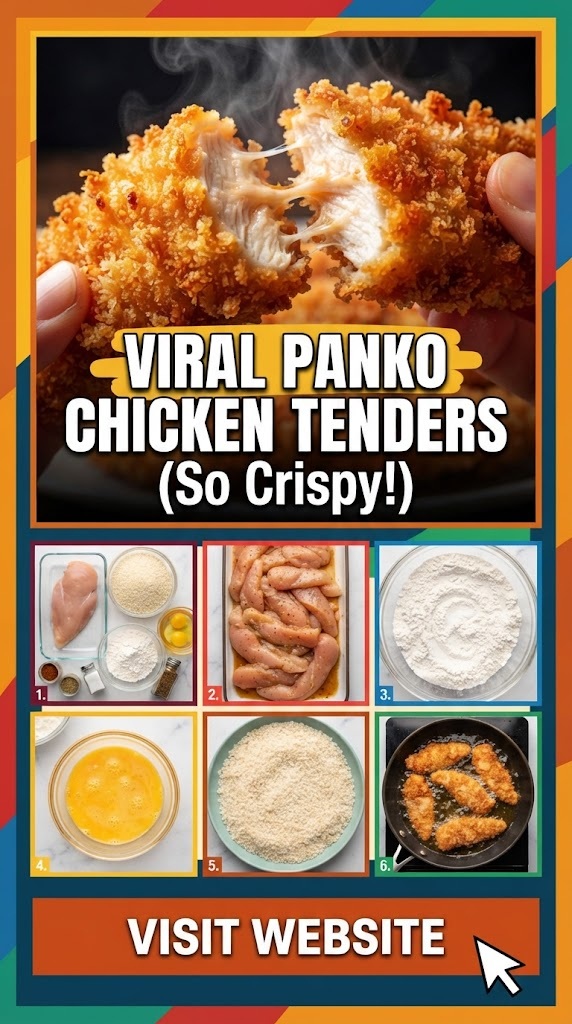
There is a specific sound that defines a perfect chicken tender. It isn’t a dull thud or a soft crumble; it’s a sharp, resonant shatter that signals a perfectly aerated, ultra-crisp exterior. If you have spent any time scrolling through culinary social media lately, you have likely seen these “viral” tenders—glistening, golden-brown batons of poultry that look almost too textured to be real. As a chef, I can tell you that this isn’t just camera magic or clever lighting. It is the result of understanding the specific relationship between protein, moisture, and the unique geometry of Japanese panko breadcrumbs.
Most home cooks struggle with “soggy bottom” syndrome or breading that slides off the chicken like an oversized coat. We have all been there: you spend forty minutes dredging and frying, only to have the crust detach the moment you take a bite. This recipe is designed to eliminate those failures. We are moving beyond the basic flour-and-egg wash and stepping into a professional-grade technique that ensures every square millimeter of that chicken is locked in a crispy, seasoned embrace. This is about more than just a quick weeknight dinner; it is about mastering the fundamental mechanics of the deep fry and the air fry to create a meal that rivals the best specialized “hot chicken” joints in the country.
Why Panko Changes Everything
To understand why this recipe has gone viral, we first have to look at the anatomy of the breadcrumb. Traditional American breadcrumbs are ground into tiny, dense spheres. When they hit hot oil, they absorb it like a sponge, often resulting in a heavy, greasy mouthfeel. Panko, however, is made from crustless bread that is processed into large, jagged flakes.
Because these flakes have a larger surface area and a more porous structure, they don’t just “sit” on the chicken; they create a microscopic scaffolding of air pockets. These pockets allow steam to escape from the chicken as it cooks, preventing the meat from becoming rubbery while simultaneously preventing the oil from saturating the crust. The result is a lighter, crispier, and more durable crunch that stays “active” even after the chicken has cooled slightly.
The Component Breakdown: Ingredients for Success
In a professional kitchen, we don’t just grab “chicken.” We look at the integrity of the muscle fiber. For this recipe, the quality of your raw materials will dictate the final outcome.
1. The Poultry
While you can certainly buy pre-cut “tenders” (which are actually the pectoralis minor muscle located underneath the breast), I often recommend buying whole chicken breasts and slicing them yourself. Why? Because you can control the thickness and ensure a uniform cook time. If you use true tenderloins, be sure to remove the tough white tendon that runs through the top—nothing ruins a viral food moment like a chewy bit of connective tissue.
2. The Binder (The “Glue”)
The secret to breading that never falls off is a three-stage dredging system. However, we are going to elevate the middle stage. Instead of just plain whisked eggs, we use a mixture of egg, heavy cream (or buttermilk), and a hit of Dijon mustard. The proteins in the dairy help the flour and panko fuse together, creating a structural bond that survives the heat of the fryer.
3. The Seasoning Profile
Bland chicken is a cardinal sin. We season at every level. The flour is seasoned, the egg wash is seasoned, and the panko itself is seasoned. We are looking for a classic savory profile: garlic powder, onion powder, smoked paprika for color, and a generous amount of Kosher salt and freshly cracked black pepper.
4. The Panko Base
For that viral look, we don’t just use panko straight out of the box. We mix it with a small amount of finely grated Parmesan cheese (the kind that looks like sand, not the long shreds). As the cheese melts in the fryer, it acts as a secondary adhesive and adds a nutty, umami depth that salt alone cannot provide.
Professional Equipment List
Before you drop a single piece of chicken into the pan, your mise en place must be perfect. Efficiency in the kitchen leads to better temperature control.
- A Heavy-Bottomed Skillet or Dutch Oven: Cast iron is king here because it retains heat. When you add cold chicken to hot oil, the temperature drops. Cast iron minimizes that drop.
- A Wire Cooling Rack: Never, ever rest fried chicken on paper towels. The steam trapped between the chicken and the towel will turn your crispy bottom into mush in seconds. A wire rack allows air to circulate 360 degrees.
- Digital Instant-Read Thermometer: We are looking for 165°F (74°C) internally. Guessing is for amateurs; precision is for chefs.
- Standard Dredging Trays: Three shallow bowls or rimmed baking sheets.
- Tongs: Two pairs—one for wet handling and one for dry/frying. This prevents “club hand” (where your fingers become breaded along with the chicken).
Step-by-Step: The Architecture of the Perfect Tender
Stage 1: Preparation and Brining
If you have the time, soak your sliced chicken strips in salted buttermilk for 30 minutes before starting. This tenderizes the meat through mild enzymatic action. If you’re in a rush, simply pat the chicken extremely dry with paper towels. Moisture is the enemy of the initial flour dredge. If the chicken is wet, the flour becomes a paste that will eventually steam off the meat.
Stage 2: The Triple-Dredge System
Set up your station from left to right:
- Flour Station: All-purpose flour mixed with salt, pepper, and garlic powder.
- Liquid Station: Whisked eggs, a splash of cream, and a teaspoon of hot sauce.
- Crunch Station: Panko flakes, smoked paprika, and grated Parmesan.
The Technique: Pick up a strip with your “wet” hand. Toss it in the flour. Shake off every bit of excess—you want a dusty coating, not a thick shell. Submerge it in the egg wash, then let the excess drip off. Drop it into the panko. Use your “dry” hand to heap the panko over the chicken and press down firmly. This “press” is what creates those craggy, viral-worthy peaks and valleys on the crust.
Stage 3: The Fry
Heat your oil (neutral oil like canola, grapeseed, or peanut) to 350°F. Do not crowd the pan. If you put too many pieces in at once, the oil temperature will plummet, and the breading will absorb oil instead of searing.
Fry for about 3-4 minutes per side. You are looking for a deep, “GBD” (Golden Brown and Delicious) hue. When you flip the chicken, do it gently to avoid knocking off the crust you worked so hard to build.
Stage 4: The Recovery (Resting)
Once the internal temperature hits 160°F, remove the tenders. The carryover heat will bring them to the safe 165°F mark while they rest on the wire rack. Let them sit for at least 3 minutes. This allows the juices to redistribute so that the first bite is moist, not a spray of hot liquid.
Secrets to the “Viral” Look
If you want your tenders to look like the ones that get millions of views, follow these “pro-only” tips:
- The Double Panko Dip: For an extra-thick crust, some chefs go Flour -> Egg -> Panko -> Egg -> Panko. It’s heavy, but the crunch is astronomical.
- Pre-Toast the Panko (For Baking/Air Frying): If you are air-frying or baking instead of deep-frying, panko won’t always brown evenly. Toss your panko in a pan with a tablespoon of oil over medium heat until it’s pale gold before you bread the chicken. This ensures a uniform, deep color without overcooking the meat.
- High-Altitude Seasoning: Sprinkle a tiny pinch of fine sea salt over the tenders the very second they come out of the oil. The residual surface oil will grab the salt and pull it into the crust.
Alternative Cooking Methods: Air Fryer vs. Oven
While deep frying is the gold standard for flavor, modern kitchen tech offers excellent alternatives.
The Air Fryer Route: Preheat your air fryer to 400°F. Lightly spray the basket with non-stick spray. Arrange the tenders in a single layer with space between them. Spray the tops of the chicken generously with an oil mister. Cook for 6 minutes, flip, spray again, and cook for another 5-6 minutes. The air fryer relies on high-velocity hot air; without that top-coat of oil spray, the panko will stay white and dry.
The Oven-Baked Route: Set your oven to 425°F. Use a sheet pan with a wire rack set inside it. This allows the heat to hit the bottom of the chicken, preventing sogginess. Bake for 15-18 minutes, turning halfway through. Again, the “pre-toasted panko” trick mentioned above is essential for the oven method if you want that viral glow.
Beyond the Tender: Customizing Your Flavor
The beauty of the panko tender is its versatility. Once you master the base technique, you can pivot the flavor profile to suit any craving.
- The Nashville Hot Twist: After frying, whisk a tablespoon of the hot frying oil with cayenne pepper, brown sugar, and chili powder. Brush this spicy oil over the finished tenders.
- The Lemon-Herb Elevation: Add lemon zest and dried parsley to the panko mixture. Serve with a side of garlic aioli.
- The Korean-Style Glaze: Instead of keeping them dry, toss the finished crispy tenders in a mixture of gochujang, honey, and soy sauce. Because we used panko, the chicken will stay crunchy even under the weight of the sauce.
Common Pitfalls and How to Avoid Them
Even experienced cooks can run into trouble. Here is how to troubleshoot your tenders:
- Breading is falling off: This usually happens because the chicken was too wet before the flour, or you didn’t press the panko in hard enough. Make sure the chicken is bone-dry before it touches the flour.
- The crust is dark, but the center is raw: Your oil is too hot. If the oil is screaming at 400°F, the outside will burn before the inside reaches safety. Use a thermometer to maintain 350°F.
- The chicken is dry: You likely overcooked it. White meat chicken has very little fat; even two minutes too long in the fryer can turn it into sawdust. Pull it at 160°F and let it carry over to 165°F.
- The crust is greasy: Your oil was too cold. If the oil isn’t hot enough to instantly create steam when the chicken hits it, the oil will soak into the breading.
The Perfect Pairing: Homemade Dipping Sauces
A viral tender deserves a world-class sauce. Skip the bottled stuff and whip up one of these three-minute accompaniments:
- The “Classic” Fry Sauce: 1/2 cup mayo, 1/4 cup ketchup, 1 tsp Worcestershire sauce, 1/2 tsp black pepper, and a pinch of garlic powder. It’s tangy, creamy, and hits all the nostalgic notes.
- Honey Mustard Gastrique: Equal parts honey and Dijon mustard, a splash of apple cider vinegar, and a pinch of cayenne. The vinegar cuts through the richness of the fried breading.
- Spicy Garlic Aioli: 1/2 cup mayo, 2 cloves of grated garlic, a squeeze of lime, and a tablespoon of Sriracha.
Frequently Asked Questions
Can I use frozen chicken? Yes, but it must be completely thawed and patted dry. Frozen chicken often releases more moisture during the cooking process, which can lead to the breading detaching. Thaw it in the refrigerator overnight for the best results.
What is the best oil for frying chicken? Peanut oil is the industry favorite because of its high smoke point and neutral flavor. However, canola or vegetable oil work perfectly well for home use. Avoid olive oil or butter, as they will burn at the temperatures required for a proper fry.
How do I keep the tenders warm if I’m cooking in batches? Place a baking sheet with a wire rack in an oven set to 200°F. As each batch finished and rests for a minute, move it to the oven rack. This keeps them warm and crispy while you finish the rest of the chicken.
Can I make these gluten-free? Absolutely. Substitute the all-purpose flour with a 1-to-1 gluten-free flour blend and use gluten-free panko (usually made from rice flour). The texture is remarkably similar to the original.
How long do leftovers stay crispy? Panko holds its texture better than traditional crumbs, but it will eventually soften in the fridge. To revive them, do not use a microwave. Place them in a 350°F oven or air fryer for 3-5 minutes until the oil in the crust begins to sizzle again.
Storage and Meal Prep Instructions
If you are a fan of meal prepping, these panko tenders are a fantastic option.
Refrigeration: Store cooked tenders in an airtight container for up to 4 days. Freezing (Raw): You can bread the chicken entirely, place them on a baking sheet to “flash freeze” for an hour, and then transfer them to a freezer bag. Cook them directly from frozen by adding 2-3 minutes to the frying or air-frying time. Freezing (Cooked): Let the tenders cool completely. Freeze in a single layer, then bag them. Reheat in an air fryer at 375°F for 8 minutes for a “just-cooked” experience.
Nutrition Insight (Per Serving)
While “fried chicken” and “diet” rarely appear in the same sentence, making these at home allows you to control the quality of the fats and the amount of sodium. By using an air fryer, you can reduce the fat content by up to 70% compared to traditional deep frying. Each 4-ounce serving of chicken provides approximately 25-30 grams of high-quality protein, making this a satisfying and muscle-building meal when paired with a fresh green salad or roasted vegetables.
Final Thoughts from the Chef’s Table
Creating the perfect panko chicken tender is an exercise in mindfulness. It’s about the tactile sensation of pressing the flakes into the protein, the auditory cue of the sizzling oil, and the visual check of that perfect amber hue. In a world of fast food and pre-packaged frozen nuggets, taking the time to execute this viral recipe at home is a transformative experience for your palate.
When you set a plate of these down on the table—shimmering with salt, impossibly craggy, and steaming hot—you aren’t just serving dinner. You are serving a masterclass in texture. Whether you are feeding a family of four or just looking to elevate your own weekend “cheat meal,” these tenders represent the pinnacle of home-cooked comfort. Forget the drive-thru; the best chicken in town is now coming out of your own kitchen. Grab your panko, check your oil temp, and get ready for the best crunch of your life.
Recipe Summary Table
| Step | Action | Key Tip |
|---|---|---|
| Prep | Slice chicken and pat bone-dry. | Dryness equals adhesion. |
| Dredge 1 | Light coat of seasoned flour. | Shake off all excess. |
| Dredge 2 | Submerge in egg/cream wash. | Let the excess drip off. |
| Dredge 3 | Press firmly into Panko/Parmesan. | Create those “craggy” peaks. |
| Cook | Fry at 350°F for 4 mins per side. | Don’t crowd the pan. |
| Finish | Rest on a wire rack for 3 mins. | Never use paper towels! |
Conclusion
Mastering the viral panko chicken tender is a rite of passage for the modern home cook. By focusing on the structural integrity of the breading and the precision of the cook temperature, you move beyond “standard” fried chicken into the realm of culinary excellence. These tenders are a testament to the fact that simple ingredients—chicken, breadcrumbs, and seasonings—can be elevated to extraordinary heights through proper technique. Enjoy the crunch, experiment with your sauces, and remember: the secret is in the panko!