
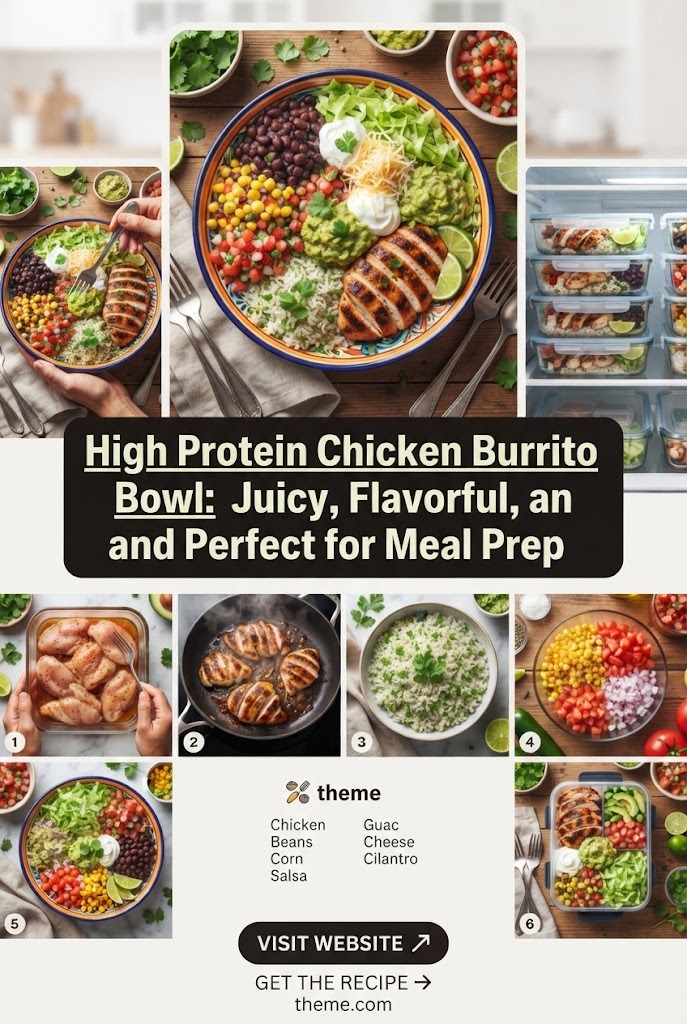
The burrito bowl has transcended its origins as a fast-casual staple to become a cornerstone of the modern fitness diet. Why? Because it offers the perfect marriage of macros: high-quality protein, complex carbohydrates, healthy fats, and a mountain of fiber-rich vegetables. However, the tragedy of many home-cooked burrito bowls is the chicken. Too often, it ends up dry, bland, or rubbery—a chore to eat rather than a highlight of the day.
If you are looking to elevate your meal prep game, you need chicken that isn’t just “fuel,” but a culinary experience. To achieve that “juicy and flavorful” result, we must look at the science of marination, the art of the sear, and the balance of spices. This guide provides a deep dive into five distinct high-protein chicken recipes tailored specifically for the burrito bowl format, ensuring every bite is an explosion of Tex-Mex inspired goodness.
The Secret to Juicy, High-Protein Chicken
Before we dive into the recipes, we must address the fundamental problem: dry chicken breast. Chicken breast is the gold standard for high protein because of its lean profile, but its lack of fat makes it unforgiving.
1. The Power of the Acidic Marinade
Acid (lime juice, vinegar, or yogurt) breaks down the tough protein fibers on the surface of the chicken. This allows moisture and flavor to penetrate deeper. In a burrito bowl context, lime juice is your best friend.
2. The Internal Temperature Rule
Never guess when chicken is done. The difference between 165°F (74°C) and 180°F is the difference between a succulent meal and a piece of cardboard. Use a meat thermometer and pull the chicken off the heat at 160°F; carry-over cooking will bring it to the safe 165°F while retaining all the juices.
3. Slicing Against the Grain
If you look closely at a chicken breast, you’ll see the muscle fibers running in one direction. By slicing perpendicular to these fibers, you shorten them, making the meat feel significantly more tender in your mouth.
Recipe 1: The “Chipotle-Style” Smoked Honey Chicken
This recipe mimics the deep, smoky heat of a professional kitchen but adds a touch of honey to caramelize the exterior, locking in moisture.
Ingredient Details (Form Shape)
| Category | Ingredient | Quantity | Purpose |
|---|---|---|---|
| Protein | Boneless, Skinless Chicken Breast | 2 lbs | Primary protein source |
| Acid | Fresh Lime Juice | 3 tbsp | Tenderizer and brightness |
| Spice | Chipotle Peppers in Adobo | 2 peppers (minced) | Smoky heat and color |
| Sweetener | Raw Honey | 1 tbsp | Caramelization and balance |
| Aromatics | Garlic Cloves | 4 large (crushed) | Pungent base flavor |
| Oil | Extra Virgin Olive Oil | 2 tbsp | Fat carrier for spices |
| Dry Rub | Cumin & Smoked Paprika | 1 tsp each | Earthy undertones |
| Seasoning | Sea Salt & Black Pepper | To taste | Flavor enhancement |
Step-by-Step Instructions
- Prepare the Marinade: In a large glass bowl, whisk together the minced chipotle peppers, adobo sauce, lime juice, honey, olive oil, crushed garlic, cumin, and smoked paprika.
- Prep the Chicken: Pat the chicken breasts dry with paper towels. This is crucial for a good sear. If the breasts are very thick, slice them in half horizontally (butterfly) to ensure even cooking.
- Marinate: Submerge the chicken in the marinade. Cover and refrigerate for at least 30 minutes, though 4 hours is ideal. Do not exceed 12 hours, or the lime juice will begin to “cook” the meat, making it mushy.
- The Sear: Heat a cast-iron skillet or heavy-bottomed pan over medium-high heat. Add a teaspoon of oil. Place the chicken in the pan, leaving space between pieces.
- Cook: Sear for 5–6 minutes on the first side without moving it to develop a dark, caramelized crust. Flip and cook for another 4–5 minutes.
- Rest: Transfer the chicken to a cutting board and let it rest for a full 8 minutes. This allows the juices to redistribute.
- Slice: Dice into 1/2-inch cubes, perfect for mixing into a bowl with rice and beans.
Recipe 2: Slow-Cooker Salsa Verde Shredded Chicken
For those who prefer a “pulled” texture that stays moist even after reheating, the slow-cooker method using salsa verde is unbeatable. The chicken essentially braises in its own juices.
Ingredient Details (Form Shape)
| Category | Ingredient | Quantity | Purpose |
|---|---|---|---|
| Protein | Chicken Thighs (Trimmed) | 2 lbs | Higher fat content for moisture |
| Liquid | Tomatillo Salsa Verde | 1 jar (16 oz) | The primary flavoring agent |
| Veggie | White Onion | 1 medium (diced) | Adds sweetness and texture |
| Heat | Fresh Jalapeño | 1 (seeded/minced) | Controlled spice level |
| Herb | Fresh Cilantro | 1/2 cup (chopped) | Post-cook freshness |
| Spice | Ground Coriander | 1 tsp | Floral, citrusy notes |
| Citrus | Fresh Lime | 1 unit | Finishing acidity |
Step-by-Step Instructions
- Layer the Cooker: Place the diced onions and minced jalapeño at the bottom of the slow cooker.
- Season the Meat: Season the chicken thighs lightly with salt and coriander. Place them on top of the onions.
- Add Salsa: Pour the entire jar of salsa verde over the chicken, ensuring every piece is covered.
- Slow Cook: Set the slow cooker to “Low” for 4–5 hours or “High” for 2–3 hours. Avoid overcooking, as even thighs can become stringy if left too long.
- Shred: Once the chicken reaches 165°F, remove it from the pot and place it in a large bowl. Use two forks to shred the meat.
- The Reduction (Pro Tip): Don’t throw away the liquid in the pot! Pour it into a saucepan and simmer over high heat for 10 minutes until it thickens into a glaze.
- Combine: Toss the shredded chicken back into the thickened sauce and stir in fresh cilantro and a squeeze of lime.
Recipe 3: Zesty Cilantro-Lime Garlic Butter Chicken
This recipe is for those who want a “cleaner” flavor profile that emphasizes fresh herbs and a rich, buttery finish without excessive calories.
Ingredient Details (Form Shape)
| Category | Ingredient | Quantity | Purpose |
|---|---|---|---|
| Protein | Chicken Breast Tenders | 1.5 lbs | Quick-cooking protein |
| Fat | Grass-fed Butter | 1.5 tbsp | Richness and mouthfeel |
| Herb | Fresh Cilantro | 1 cup (packed) | Signature flavor |
| Aromatics | Minced Garlic | 6 cloves | Intense savory punch |
| Spice | Onion Powder | 1 tsp | Savory depth |
| Liquid | Chicken Bone Broth | 1/4 cup | For pan deglazing/moisture |
| Seasoning | Red Pepper Flakes | 1/2 tsp | Subtle background heat |
Step-by-Step Instructions
- The Herb Paste: In a small processor or using a mortar and pestle, blend the cilantro, 3 cloves of garlic, and a tablespoon of olive oil into a thick paste.
- Coat the Chicken: Toss the chicken tenders in the herb paste and let sit for 15 minutes.
- Pan Searing: Heat a large skillet. Add half the butter. Once bubbling, add the chicken.
- Quick Cook: Since tenders are thin, cook for only 3–4 minutes per side.
- The Butter Glaze: In the final 2 minutes of cooking, add the remaining butter, the rest of the minced garlic, and the red pepper flakes.
- Deglaze: Pour in the bone broth. This will lift the browned bits (fond) from the bottom of the pan and create a light sauce that coats the chicken.
- Finish: Garnish with extra lime and serve immediately over a bed of quinoa or cauliflower rice.
Recipe 4: Sheet-Pan Fajita Chicken Burrito Bowl Base
If you are cooking for a family or meal prepping for the entire week, the sheet-pan method is the most efficient. By roasting the chicken with peppers and onions, the juices mingle to create a built-in sauce.
Ingredient Details (Form Shape)
| Category | Ingredient | Quantity | Purpose |
|---|---|---|---|
| Protein | Chicken Breast Strips | 2 lbs | Uniform cooking size |
| Veggie | Bell Peppers (Mixed) | 3 large | Sweetness and fiber |
| Veggie | Red Onion | 1 large | Pungency and color |
| Oil | Avocado Oil | 3 tbsp | High smoke point for roasting |
| Spice Mix | Chili Powder | 2 tbsp | The “burrito” base flavor |
| Spice Mix | Cumin | 1 tbsp | Earthy aroma |
| Spice Mix | Garlic Powder | 1 tbsp | Even distribution of flavor |
| Acid | Apple Cider Vinegar | 1 tbsp | To brighten the roasted veg |
Step-by-Step Instructions
- Preheat: Set your oven to 425°F (220°C). High heat is necessary to mimic a grill and prevent the vegetables from getting soggy.
- Slice Uniformly: Slice the chicken, peppers, and onions into strips of similar thickness. This ensures they all finish cooking at the same time.
- The Toss: On a large baking sheet (or two), combine the chicken and vegetables. Drizzle with avocado oil and sprinkle the spice mix (chili powder, cumin, garlic powder, salt, pepper) over everything. Use your hands to massage the spices into the meat.
- Spread Out: Ensure the ingredients are in a single layer. If the pan is crowded, the chicken will steam rather than roast, losing that “flavorful” crust.
- Roast: Bake for 18–22 minutes. At the halfway mark, use a spatula to toss the ingredients.
- Broil (Optional): For extra charred edges, turn the broiler on for the last 2 minutes.
- Final Touch: Drizzle the apple cider vinegar over the hot pan as soon as it comes out of the oven. The steam will carry the acidity through the dish.
Recipe 5: Crispy Air-Fryer “Fried” Chicken Burrito Bowl
Sometimes you want that crispy texture without the deep-frying. This high-protein version uses a lean coating to provide crunch, making it a fantastic contrast to soft beans and avocado.
Ingredient Details (Form Shape)
| Category | Ingredient | Quantity | Purpose |
|---|---|---|---|
| Protein | Chicken Breast Cubes | 1.5 lbs | Bite-sized pieces |
| Coating | Nutritional Yeast | 1/4 cup | Cheesy flavor & extra protein |
| Coating | Almond Flour | 2 tbsp | Crispiness without wheat |
| Binder | Egg Whites | 2 large | Holds the coating on |
| Spice | Smoked Paprika | 1 tsp | For a golden color |
| Seasoning | Salt & Cayenne | To taste | Spice and seasoning |
Step-by-Step Instructions
- Dredge Station: Set up two bowls. Bowl 1: Egg whites whisked until frothy. Bowl 2: Nutritional yeast, almond flour, paprika, salt, and cayenne.
- Coat: Dip each chicken cube into the egg whites, then roll in the nutritional yeast mixture until fully coated.
- Air Fryer Setup: Lightly spray the air fryer basket with oil. Place chicken cubes in a single layer, making sure they don’t touch.
- Cook: Air fry at 400°F (200°C) for 10–12 minutes. Shake the basket halfway through to ensure all sides get crispy.
- Check: The coating should be golden brown and firm.
- Assemble: These crispy bites are best added to the bowl at the very end to maintain their texture against the wetter ingredients.
Building the Rest of the Bowl: The Foundation
A burrito bowl is only as good as its supporting cast. To keep the protein high and the flavor “juicy,” you need to choose your bases and toppings wisely.
1. The Grain Base
- Cilantro Lime Rice: Use basmati or jasmine rice. After cooking, stir in lime juice, lime zest, and a handful of chopped cilantro.
- Quinoa: A higher protein alternative to rice. It absorbs sauces beautifully.
- Cauliflower Rice: For those looking to keep calories low while keeping volume high. Sauté it with garlic to remove the “raw” vegetable taste.
2. The Legumes (Fiber & Protein)
Don’t just open a can of beans. Simmer black beans or pinto beans with a bit of chicken stock, a bay leaf, and a pinch of cumin. This turns a boring side into a flavorful component that complements the chicken.
3. The Healthy Fats
- Guacamole: Mash avocado with lime, salt, and red onion.
- Greek Yogurt “Crema”: Swap sour cream for plain, non-fat Greek yogurt. Thin it out with lime juice and a dash of hot sauce. This adds an extra 5–10g of protein to your bowl.
Maximizing Flavor with “Flavor Bombs”
To ensure your chicken burrito bowl is never boring, incorporate these “flavor bombs” that add complexity without a lot of extra calories.
Pickled Red Onions
Thinly slice red onions and submerge them in a mixture of apple cider vinegar, water, salt, and a pinch of sugar. Let them sit for 30 minutes. The bright pink color and acidic crunch cut through the richness of the chicken and avocado.
Corn Salsa
Char frozen or canned corn in a dry skillet until blackened spots appear. Mix with diced jalapeños, red onion, and lime. This adds a smoky sweetness that is classic in Mexican-inspired bowls.
The “Magic” Green Sauce
Blend one bunch of cilantro, one jalapeño, two cloves of garlic, the juice of two limes, and half an avocado. This creamy, spicy, zesty sauce ties the entire bowl together and keeps the chicken feeling juicy even if it’s been reheated.
Meal Prepping for Success
The beauty of these recipes is their “meal-prepability.” Here is how to keep your high-protein bowls fresh for up to five days:
- Keep Cold Items Separate: If you are packing these for work, keep the salsa, Greek yogurt, and guacamole in small, separate containers. Adding cold sauce to a bowl you plan to microwave results in a soggy mess.
- The “Steam” Reheating Method: When reheating chicken, place a damp paper towel over the container. This creates steam in the microwave, preventing the chicken from drying out.
- Cool Before Closing: Never put a lid on a hot burrito bowl. The steam will condense into water, making your rice mushy and your chicken rubbery. Let everything reach room temperature before sealing.
The Nutritional Logic: Why This Works
A standard chicken burrito bowl using the recipes above typically lands in the following nutritional range:
- Protein: 45g – 55g
- Carbohydrates: 40g – 60g (depending on rice/bean ratio)
- Fats: 12g – 18g (mostly from avocado and olive oil)
- Fiber: 10g – 15g
This macro profile is ideal for muscle recovery and satiety. High protein ensures you maintain lean muscle mass, while the high fiber content from the beans and vegetables keeps your digestion on track and prevents the “afternoon slump” often associated with high-carb lunches.
Troubleshooting Common Issues
“My chicken is flavorful on the outside but bland on the inside.”
This happens when the chicken pieces are too large or weren’t marinated long enough. Try dicing the chicken before marinating it. This increases the surface area, ensuring every bite is seasoned.
“My burrito bowl is too watery.”
This usually comes from the vegetables or the salsa. If using frozen corn or canned beans, ensure they are drained and dried thoroughly. If your salsa is very liquidy, strain it through a fine-mesh sieve before adding it to the bowl.
“The chicken gets tough when I reheat it.”
This is the nature of chicken breast. To combat this, lean towards Recipe 2 (Slow-Cooker Shredded Chicken) for meal prep, as shredded meat in sauce survives the microwave much better than grilled cubes.
Conclusion: Elevate Your Routine
Eating for health and protein doesn’t have to be a repetitive cycle of plain chicken and steamed broccoli. By utilizing the “Burrito Bowl” framework, you tap into a world of vibrant flavors, varied textures, and satisfying portions.
Whether you choose the smoky depth of the Chipotle Honey Grilled Chicken, the tender ease of the Salsa Verde Shredded Chicken, or the crunch of the Air-Fryer Bites, the key remains the same: treat your protein with respect. Use marinades, watch your temperatures, and don’t skimp on the acidic finishes.
With these five recipes in your arsenal, you are no longer just “meal prepping”—you are crafting high-performance, gourmet-inspired fuel that will keep you excited about your fitness journey one juicy, flavorful bite at a time.