
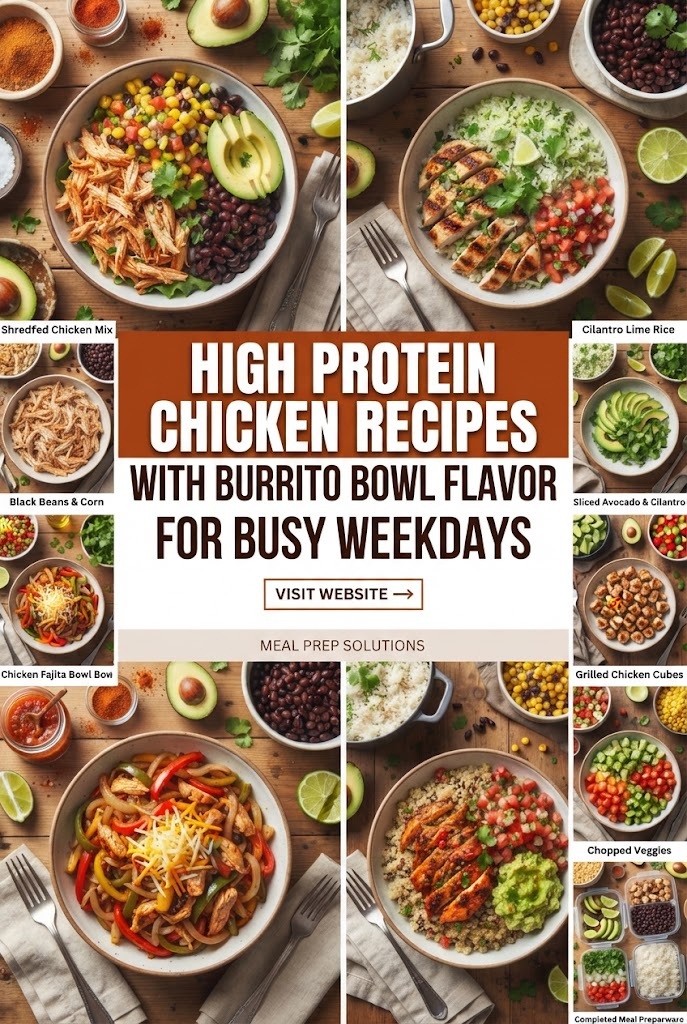
The modern weekday is a whirlwind. Between professional obligations, family commitments, and the pursuit of a healthy lifestyle, the “lunch hour” often becomes a “lunch ten minutes.” However, sacrificing nutrition for convenience is a recipe for afternoon fatigue and long-term health plateaus. Enter the high-protein chicken burrito bowl: the ultimate solution for the time-crunched foodie.
Burrito bowls are more than just a trend; they are a nutritional powerhouse. By stripping away the calorie-dense flour tortilla, you open up a world of vibrant vegetables, complex carbohydrates, and, most importantly, lean protein. Chicken, being incredibly versatile and cost-effective, serves as the perfect canvas for the bold, smoky, and zesty flavors of Mexican-inspired cuisine.
In this comprehensive guide, we will explore five distinct high-protein chicken recipes specifically designed for burrito bowl enthusiasts. Each recipe is optimized for meal prep, ensuring your busy weekdays are fueled by delicious, muscle-building meals.
The Nutritional Science of the Burrito Bowl
Before diving into the recipes, it is essential to understand why this specific meal structure is so effective for busy individuals.
- Protein Satiety: Chicken breast provides approximately 31 grams of protein per 100 grams. High protein intake triggers the release of satiety hormones, keeping you full until dinner and preventing the dreaded 3 PM snack raid.
- Fiber-Rich Complex Carbs: By using black beans, corn, and brown rice or quinoa, you provide your brain with a steady stream of glucose rather than the spikes and crashes associated with refined sugars.
- Healthy Fats: Avocado and olive oil-based dressings provide monounsaturated fats, which are crucial for hormone production and nutrient absorption.
- Micronutrient Density: The inclusion of bell peppers, onions, tomatoes, and cilantro ensures you are getting a wide spectrum of vitamins A, C, and K, as well as essential minerals.
Recipe 1: The Classic Chipotle-Style Grilled Chicken Bowl
This recipe mimics the iconic flavor profile of your favorite fast-casual grill but with better control over sodium and oil. The key lies in the marinade, which uses chipotle peppers in adobo sauce to provide that signature smoky heat.
Ingredient Details (Form Shape)
| Component | Ingredients | Quantity |
|---|---|---|
| Protein | Boneless, Skinless Chicken Thighs (or Breasts) | 2 lbs |
| The Marinade | Chipotle Peppers in Adobo Sauce (minced) | 2 tbsp |
| Extra Virgin Olive Oil | 2 tbsp | |
| Fresh Lime Juice | 2 tbsp | |
| Garlic (minced) | 4 cloves | |
| Dried Oregano, Cumin, Salt, Black Pepper | 1 tsp each | |
| The Base | Cilantro Lime Brown Rice | 3 cups cooked |
| Vegetables | Black Beans (drained and rinsed) | 1 can (15 oz) |
| Frozen or Fresh Corn Kernels | 1 cup | |
| Red Onion (finely diced) | 1/2 cup | |
| Garnish | Fresh Cilantro, Avocado, Greek Yogurt (as sour cream sub) | To taste |
Recipe Detail: Step-by-Step
Step 1: The Marinade Infusion In a large glass bowl or a heavy-duty gallon freezer bag, combine the minced chipotle peppers, olive oil, lime juice, minced garlic, oregano, cumin, salt, and pepper. Whisk until emulsified. Add the chicken pieces, ensuring every inch is coated in the smoky mixture. Seal and refrigerate for at least 30 minutes, though 4 hours is ideal for maximum flavor penetration.
Step 2: Preparing the Cilantro Lime Base While the chicken marinates, cook your brown rice according to package instructions. Once fluffy and tender, fold in a handful of finely chopped cilantro, a squeeze of fresh lime juice, and a pinch of salt. Keep covered to maintain moisture.
Step 3: Searing for Flavor Heat a cast-iron skillet or outdoor grill to medium-high heat. Lightly oil the surface. Place the chicken on the heat. If using thighs, cook for 5–7 minutes per side until charred and the internal temperature reaches 165°F (74°C). If using breasts, be careful not to overcook—usually 4–5 minutes per side is sufficient.
Step 4: The Resting Period Transfer the cooked chicken to a cutting board and let it rest for 5–10 minutes. This allows the juices to redistribute, ensuring every bite is succulent rather than dry. Slice into bite-sized cubes.
Step 5: Assembly Divide the cilantro lime rice into four to five meal prep containers. Layer on the black beans, corn, and diced red onion. Top with a generous portion of the grilled chipotle chicken.
Step 6: Final Flourish Before serving (or when packing for the day), add a dollop of Greek yogurt (a high-protein alternative to sour cream), sliced avocado, and a sprinkle of fresh cilantro.
Recipe 2: Slow Cooker Salsa Verde Shredded Chicken Bowl
For the truly busy weekday, the slow cooker is your best friend. This “set it and forget it” recipe results in tender, succulent shredded chicken that absorbs the tangy, bright flavors of tomatillo salsa.
Ingredient Details (Form Shape)
| Component | Ingredients | Quantity |
|---|---|---|
| Protein | Boneless, Skinless Chicken Breasts | 2.5 lbs |
| Cooking Liquid | Salsa Verde (Jarred or Homemade) | 16 oz |
| Low-Sodium Chicken Broth | 1/4 cup | |
| Diced Green Chiles | 1 can (4 oz) | |
| The Base | Quinoa (cooked) | 3 cups |
| Vegetables | Sliced Bell Peppers (Sautéed) | 2 large |
| Pickled Red Onions | 1/2 cup | |
| Pinto Beans (drained) | 1 can (15 oz) | |
| Creamy Element | Cotija Cheese or Feta | 1/4 cup crumbled |
Recipe Detail: Step-by-Step
Step 1: Slow Cooking Prep Place the raw chicken breasts in the bottom of your slow cooker. Pour the entire jar of salsa verde over the top, followed by the chicken broth and the diced green chiles. There is no need to add extra salt at this stage as the salsa usually contains enough.
Step 2: The Cooking Process Set the slow cooker to ‘Low’ for 6–7 hours or ‘High’ for 3–4 hours. The goal is for the chicken to be tender enough to pull apart easily with two forks.
Step 3: Shredding and Soaking Once cooked, remove the chicken from the pot and place it in a large bowl. Use two forks to shred the meat. Return the shredded chicken to the slow cooker and let it sit in the juices on the ‘Warm’ setting for another 20 minutes. This ensures the chicken is incredibly moist.
Step 4: Preparing the Quinoa Cook the quinoa in chicken broth (rather than water) to add an extra layer of flavor and protein. Quinoa is a complete protein, making it an excellent base for this high-protein bowl.
Step 5: Sautéing the Peppers While the chicken finishes soaking, quickly sauté thinly sliced bell peppers in a hot pan with a dash of lime juice and salt until they have a slight char but remain crisp.
Step 6: Constructing the Bowl Layer the quinoa at the bottom of your bowl. Add a massive scoop of the salsa verde shredded chicken. Surround the chicken with pinto beans, the sautéed peppers, and a handful of pickled red onions for acidity.
Step 7: Topping Sprinkle with crumbled Cotija cheese and extra salsa verde if desired.
Recipe 3: Sheet Pan Fajita Chicken Bowl (The 30-Minute Wonder)
Minimal dishes, maximal flavor. This recipe is designed for the person who wants a “fresh” meal on a Tuesday night without spending an hour in the kitchen.
Ingredient Details (Form Shape)
| Component | Ingredients | Quantity |
|---|---|---|
| Protein | Chicken Breast (sliced into strips) | 1.5 lbs |
| Seasoning Mix | Chili Powder, Smoked Paprika, Garlic Powder | 1 tbsp each |
| Onion Powder, Cumin, Cayenne Pepper | 1 tsp each | |
| Avocado Oil | 3 tbsp | |
| Vegetables | Multi-colored Bell Peppers (sliced) | 3 large |
| Yellow Onion (sliced into wedges) | 1 large | |
| Zucchini (sliced into half-moons) | 1 medium | |
| The Base | Cauliflower Rice (for a low-carb, high-volume option) | 4 cups |
| Toppings | Fresh Pico de Gallo, Pumpkin Seeds (Pepitas) | 1/2 cup |
Recipe Detail: Step-by-Step
Step 1: Oven Calibration Preheat your oven to 400°F (200°C). Line a large rimmed baking sheet with parchment paper or silicone mats for easy cleanup.
Step 2: The Seasoning Toss In a large bowl, combine the sliced chicken, bell peppers, onion wedges, and zucchini. Drizzle with avocado oil and sprinkle the entire seasoning mix over the top. Use your hands or large tongs to toss everything until the spices are evenly distributed and the oil coats every piece.
Step 3: Spreading it Out Spread the mixture onto the prepared baking sheet in a single layer. Do not overcrowd the pan; if necessary, use two sheets. Overcrowding leads to steaming rather than roasting, and we want those caramelized edges!
Step 4: Roasting Bake for 18–22 minutes. At the halfway mark, give the pan a good shake or flip the chicken strips to ensure even browning.
Step 5: The Cauliflower Rice “Quick-Steam” While the sheet pan is in the oven, sauté the cauliflower rice in a separate pan with a lid for 5 minutes. Season with a little salt and lime. This keeps the meal low-calorie while adding bulk and fiber.
Step 6: Assembly Create a bed of cauliflower rice. Arrange the roasted fajita chicken and vegetable mix on top.
Step 7: The “Crunch” Factor Add a generous amount of fresh Pico de Gallo and a tablespoon of toasted pumpkin seeds (pepitas). The pepitas add a delightful crunch and an extra boost of healthy fats and minerals like magnesium.
Recipe 4: Honey Lime Cilantro Chicken Bowl (The Zesty Twist)
Sometimes you want a break from the smoky, heavy flavors. This recipe leans into the bright, sweet, and acidic notes of honey and lime, creating a refreshing yet filling high-protein lunch.
Ingredient Details (Form Shape)
| Component | Ingredients | Quantity |
|---|---|---|
| Protein | Chicken Breast (cubed) | 2 lbs |
| The Sauce | Raw Honey | 3 tbsp |
| Fresh Lime Juice | 1/4 cup | |
| Fresh Cilantro (chopped) | 1/2 cup | |
| Red Pepper Flakes | 1/2 tsp | |
| Garlic (grated) | 3 cloves | |
| The Base | White Basmati Rice | 3 cups cooked |
| Vegetables | Roasted Sweet Potatoes (cubed) | 2 medium |
| Black-Eyed Peas or Black Beans | 1 can | |
| Radishes (thinly sliced) | 4-5 total | |
| Dressing | Honey-Lime Vinaigrette | 4 tbsp |
Recipe Detail: Step-by-Step
Step 1: The Sweet & Tangy Glaze Whisk together honey, lime juice, half of the cilantro, grated garlic, and red pepper flakes in a small bowl. Set aside half of this mixture to use as a finishing sauce.
Step 2: Cooking the Chicken In a large skillet over medium-high heat, cook the cubed chicken in a splash of oil. Once the chicken is nearly cooked through (about 6–8 minutes), pour in the first half of the honey-lime glaze. Let it bubble and reduce until it forms a sticky coating over the chicken. Remove from heat.
Step 3: Roasting the Sweet Potatoes (Note: Do this simultaneously with the chicken). Toss cubed sweet potatoes in a little oil and salt. Roast at 400°F for 25 minutes until the edges are golden and the centers are soft. The sweetness of the potatoes complements the honey in the chicken perfectly.
Step 4: The Base Preparation Cook the Basmati rice. For extra fragrance, add a bay leaf to the water while it simmers.
Step 5: Assembling the “Fresh” Bowl Place a portion of rice in the bowl. Add the honey-lime chicken on one side and the roasted sweet potatoes on the other. Fill the remaining space with black beans and the thinly sliced radishes. The radishes provide a sharp, peppery crunch that cuts through the sweetness.
Step 6: The Final Drizzle Drizzle the remaining honey-lime glaze over the entire bowl and garnish with the remaining fresh cilantro.
Recipe 5: Spicy Blackened Chicken & Sweet Corn Bowl
For those who love a bit of “kick,” this recipe uses a dry-rub technique to create a flavorful crust on the chicken, paired with a cooling corn and bean salad.
Ingredient Details (Form Shape)
| Component | Ingredients | Quantity |
|---|---|---|
| Protein | Chicken Breasts (pounded to even thickness) | 2 lbs |
| Blackening Rub | Smoked Paprika, Onion Powder, Garlic Powder | 1 tbsp each |
| Cayenne, Dried Thyme, Dried Basil | 1 tsp each | |
| Salt and Heavy Black Pepper | 1 tsp each | |
| The Base | Brown Rice or Farro | 3 cups cooked |
| Corn Salad | Sweet Corn, Diced Tomato, Jalapeño | 2 cups total |
| Lime Juice and Olive Oil | 1 tbsp each | |
| The “Cooler” | Greek Yogurt Dip (Yogurt + Lime + Cumin) | 1/2 cup |
Recipe Detail: Step-by-Step
Step 1: Creating the Crust Combine all the spices for the blackening rub in a small bowl. Pat the chicken breasts dry with a paper towel (this is crucial for a good sear). Rub the spice mix generously over both sides of the chicken, pressing it in with your fingers.
Step 2: High-Heat Searing Heat a heavy skillet (cast iron is best) with a tablespoon of oil until it is shimmering. Place the chicken in the pan. Cook for 5–6 minutes per side. The spices will darken significantly—this is the “blackening” process and provides an incredible depth of flavor. Ensure the chicken reaches an internal temperature of 165°F.
Step 3: The Cooling Corn Salad While the chicken rests, mix the corn, diced tomatoes, and finely minced jalapeño (remove seeds for less heat) in a bowl. Toss with lime juice and a tiny bit of olive oil. This salad acts as a refreshing counterpoint to the spicy chicken.
Step 4: Grains and Fiber Prepare your brown rice or farro. Farro is an excellent choice here as its chewy texture stands up well to the bold spices of the chicken.
Step 5: The Yogurt “Crema” Mix plain Greek yogurt with a squeeze of lime and a dash of cumin. This provides a creamy, probiotic-rich dressing that tames the heat of the blackening spices.
Step 6: Assembly Layer the grains, a sliced blackened chicken breast, and a large scoop of the corn salad.
Step 7: Serving Drizzle the cumin-lime yogurt over the chicken and serve immediately or pack for the next day.
Master the Burrito Bowl: Pro-Tips for Success
To truly excel at the high-protein weekday lifestyle, consider these advanced strategies for your chicken burrito bowls.
1. The Art of the “Meal Prep” Rotation
Don’t cook the same recipe every week. Instead, pick two chicken styles (e.g., Shredded Salsa Verde and Grilled Chipotle) and prepare them on Sunday. Swap the bases (Rice vs. Quinoa) and the beans to keep your palate engaged.
2. Squeezing Out Excess Moisture
When using ingredients like canned beans or frozen corn, ensure they are thoroughly drained and dried. Excess water in your meal prep container will make your rice mushy and dilute the flavors of your chicken by the time Wednesday rolls around.
3. The “Avocado Hack”
Avocados turn brown quickly due to oxidation. If you are meal prepping, do not slice the avocado in advance. Instead, bring a whole avocado to work and slice it fresh, or mash it with a significant amount of lime juice (the acid slows browning) and store it in a small, airtight container with plastic wrap pressed directly onto the surface.
4. Maximizing Protein Density
To push your protein count even higher:
- Swap Rice for Lentils: Lentils offer much more protein per cup than white or brown rice.
- Double the Beans: Beans are a “two-for-one” food, providing both complex carbs and protein.
- Hemp Seeds: Sprinkle a tablespoon of hemp seeds over your bowl for an extra 3–5 grams of protein and a boost of Omega-3s.
5. Proper Reheating
Chicken can become rubbery in the microwave. To avoid this:
- Slice the chicken thinly before reheating so it warms through quickly.
- Place a damp paper towel over the bowl to create steam, which keeps the chicken moist.
- If possible, keep the “cold” items (salsa, avocado, yogurt) in a separate small container so you only heat the rice, beans, and chicken.
Comparing Bases: Which One Should You Choose?
The base of your bowl dictates the caloric density and texture. Here is a quick breakdown to help you decide:
| Base | Protein (per cup) | Fiber | Best For… |
|---|---|---|---|
| White Rice | 4g | Low | Quick energy, neutral flavor. |
| Brown Rice | 5g | Medium | Sustained energy, nutty flavor. |
| Quinoa | 8g | High | Maximum protein, complete amino acids. |
| Cauliflower Rice | 2g | High | Weight loss, low-carb, high volume. |
| Farro | 6g | Very High | Texture lovers, heart health. |
Flavor Profiles: A Deep Dive into Mexican Spices
Understanding the spices used in these recipes allows you to customize your own bowls.
- Cumin: The backbone of Mexican flavor. It provides an earthy, warm aroma.
- Smoked Paprika: Gives you that “outdoor grill” flavor even if you’re cooking on a stovetop.
- Coriander (Ground): The seed of the cilantro plant. It adds a light, citrusy, floral note that balances heavy meats.
- Mexican Oregano: Different from Mediterranean oregano; it has citrus and licorice notes that pair beautifully with tomato-based salsas.
- Chipotle: These are smoke-dried jalapeños. They provide both heat and a deep, woodsy smokiness.
Why Chicken is the King of High Protein Meal Prep
While beef and pork are delicious, chicken remains the gold standard for weekday meal prep for several reasons:
- Lean Profile: Chicken breast allows you to hit high protein targets without consuming excessive saturated fats.
- Absorption: Chicken is like a sponge; it takes on the flavor of whatever you cook it with, making it ideal for the bold spices found in burrito bowls.
- Efficiency: It cooks faster than tougher cuts of beef, saving you precious time during your Sunday prep sessions.
- Affordability: Buying chicken in bulk (family packs) significantly lowers your cost-per-meal compared to eating out.
Conclusion: Fueling Your Ambition
High-protein chicken burrito bowls are more than just a meal; they are a strategy for success. By spending a small amount of time on a Sunday or a weeknight evening to prepare these recipes, you are investing in your energy levels, your muscle recovery, and your overall well-being.
The beauty of the burrito bowl lies in its flexibility. Whether you prefer the smoky heat of chipotle, the tangy brightness of salsa verde, or the sweet-and-sour profile of honey-lime, there is a recipe here to suit every palate. By focusing on high-quality ingredients, smart preparation techniques, and the incredible versatility of chicken, you can turn your “busy weekdays” into a gourmet, health-conscious experience.
Stop settling for bland sandwiches or expensive takeout. Embrace the bowl, master the chicken, and reclaim your lunch hour with these vibrant, high-protein recipes. Your body—and your taste buds—will thank you.